Wednesday, November 27, 2013

Spinach Pie


This recipe is so simple that I don't have to give step by step instructions!!!  It seriously takes about 10 minutes to prep and 25 minutes to bake!!  I save time with this one using a store bought crust.  Of course you can make your own, but it's not really necessary.


                                                                     Ingredients:

                           1 box of frozen spinach (thawed) or a bag of fresh with stems removed
                                                             1 c. of  WARM Milk
                                                                    1 c. of Flour
                                        16 ounces of  Shredded Monterey Jack Cheese
                                                                 1 tsp. Baking Powder
                                                                         4 Eggs
                                                               3 tbsp. Minced Garlic
                                                              1/2 c. Fried Dry Onions
                                                                 1 roll of Pie Dough

Preheat the oven to 350.  Place the pie crust in a 9 inch pan and bake for 10 minutes. Rib the edges around the top.  While the crust is cooking start the filling.

 Mix the dry ingredients of flour and  baking powder. Add the milk, eggs, and cheese. Finally, fold in the spinach.  If you are using frozen spinach, make sure it is well drained.  Pour into the pie pan and cook for 35 minutes.

Take out the pie and place the fried dry onions evenly over the top.  You can also sprinkle a little more cheese over the onions.  Put back in the oven for an additional 2 minutes.  Let stand for about 15 minutes before serving.


My youngest daughter, Kayla, is my other tough critic.  When she tried this, she said , 'you have to put this on the blog!'   That's quite a compliment!! Usually, she'll say I should add this or that, but today I got it right!! They say daughters are their mothers toughest critics and that's proven true with my girls!!  Constructive criticism is what makes one better and I thank them for that!! 

I know this will be a hit for most of you, especially if you are a spinach lover or have one in your family. This is also a wonderful dish to reheat. It's actually even better reheated in my opinion.  It can be eaten for any meal, too.

I've decided that the next time I'm asked to bring something to a gathering, I'll be taking this one along!!


Sunday, November 24, 2013

Ginger Snaps in a Snap!

These little morsels of yum are going to make you look and feel like a genuine baker!!  They are an old fashioned favorite that are still popular down to this day.  With the many health benefits of ginger and molasses, they are a great alternative to chemical laced, store bought cookies. Not to mention tastier!! 
                     I love the simplicity of the ingredients and the quick prep time that's involved.
                                                   
                                                                      2 c. Flour
                                                                  1 Tbsp. of Ginger
                                                                 2 tsp. Baking Soda
                                                                       1 c. Sugar
                                                                  1/4 c. Molasses
                                                                 1 tsp. Cinnamon
                                                                    1/2 tsp. Salt
                                                                3/4 c. Shortening
                                                                         1 egg

                                                       Pretty simple and inexpensive!!

               I start with combining the shortening and the sugar.  Mix it thoroughly until creamy.
            In a separate bowl, mix the dry ingredients of flour, ginger, salt,cinnamon and baking soda.

Make sure these are well blended.  Set aside.  Add the egg and the molasses to the shortening and sugar.  Then, slowly add the dry mixture a little at a time, blending as you go.

The batter will be thick and malleable.  Using a teaspoon as your measure, form into balls.  With a dish of sugar on the side, dip the ball into it and put onto a baking sheet.


                Put into a preheated 350 degree oven for 12 minutes...NO MORE...NO LESS!!

This recipe yields about 4 1/2 to 5 dozen cookies!!  These are soft and chewy. If you store them in a zip lock bag, they stay fresh for over a week.  If they get a little hard, just zap them into the microwave for a few seconds and they bounce back to life.

I like to put a modern twist to them, so last night I made Ginger Snap Salted Caramel Sundaes!!!
                                                              They were a hit!!!

         This morning, I had two with a cup of tea.  A nice way to start a cold November day in Maine.

                                       As I said before, they are easy, cheap, and healthy to make.
                   I'm sure they will be a go-to in your kitchen soon for a quick and delicious dessert.

      When people ask, 'Did you make these? They are awesome!' , you can smile and answer 'YES!'

Friday, November 22, 2013

Italian Tortellini Soup


I've been making this soup for over 20 years.  An oldie but goodie at my house.  It's chock full of vegetables and is extremely rich in nutrients.  I love shopping in the produce department for all of these great ingredients.  It's a little pricey to make, but it makes 6 quarts, which can be frozen.

                                                           You will need the following:

                                                                 1 bunch of  Celery
                                                              2 bunches of  Scallions
                                                                    4 Carrots
                                                              1 Package of Spinach
                                                              1  can of  Diced  Tomatoes
                                                                   1/2 Red Onion
                                                     4 tbsps. of Minced or Chopped Garlic
                                                            1 Package of Cheese Tortellini
                                                             2 Quarts of Chicken Broth
                                                               Grated Parmesan Cheese
                                                              2 tbsps. Italian Seasoning
                                                                   Salt and Pepper

 To start, we need to soften the hardier vegetables by sauteing them in olive .  I chop the celery, carrots, onion, scallions and place them in the pot.  I use the ENTIRE scallion, less the roots, as well as the leafy part of the celery.  There is no reason not to and considering the high cost of food, why waste them?  Many nutrients are there as well.


 I add the garlic, Italian seasoning, salt, and pepper as well.  It's so colorful and pretty!!! Simmer over medium heat for about 15 minutes.  Add the chicken broth at this time.  I buy the low sodium jar paste.  Love it and it's so easy to use.
Stir and put the cover on the pot.  Cook on medium heat for about a half hour.  We can add the spinach once it reaches a low boil.


Turn down the heat to low, stir and cover.  Continue to cook for another 30 minutes.  Add the diced tomatoes.  Turn off the heat, but keep the lid on for an additional 15 minutes. 

The key to this soup is DO NOT ADD THE TORTELLINI until you are ready to SERVE.  Why? Because tortellini has a tendency to expand and become mushy. The other reason is that we want to be able to freeze this and reheat.  Tortellini is not famous for being able to do that!! My suggestion is to take the amount of stock you are going to be serving and put it into a smaller pot.  Add the 1/2 the tortellini and cover while you grate the parmesan cheese to garnish with. Tortellini cooks quickly in the hot broth!  It sounds like a lot of work, but it's really not.
What you'll end up with is one of the most flavorful soups you'll ever eat!!  Not one negative comment has been said to me (at least to my face) about this soup. If my oldest daughter, Tara, likes this, you know it's good!!  She's my food critic!! If it gets her stamp of approval, I know I'm golden!!  She has even requested this before!! You can also substitute the tortellini with meatballs for an incredible Italian Wedding soup.

I was teased today with a snow flurry, which motivated me to make this!!  It's another comfort food to add to your list.  Enjoy!! 

Wednesday, November 20, 2013

The Perfect Meatball


My first attempts at making meatballs were extremely scary.  I had just moved out on my own and knew very little about cooking in general.  Consequently, I think my meatballs consisted of an egg, a little salt and pepper, bread crumbs, ground beef and a squirt of ketchup!!  I didn't even drain the grease, so you can imagine how pathetic they were!!

A year or so later, I was working at a sandwich shop in South Portland, Maine.  My boss showed me his tricks and years later, my husband further refined my knowledge that I can now pass on to you.

While it is tempting to buy the frozen meatballs in the supermarket to save time, it's never worth it once you've made your own!!!

The biggest drawback for me is touching the meat!! Yuck!!  That's why I throw everything in my mixer and turn it on high!!  Of course, not everyone has the same phobia so, you can mix the ingredients with your hands like most normal people do!!

                                    2 lbs. 80% Ground Beef (a little fat keeps the meatballs juicy)
                                                            1 c. Italian Bread Crumbs
                                                                   3/4 c. V-8 Juice
                                                             1/2 finely chopped onion
                                                            1/2 finely chopped pepper
                                                            2 cloves of chopped Garlic
                                                              1/2 c. Parmesan Cheese
                                                                   1 Extra Large Egg

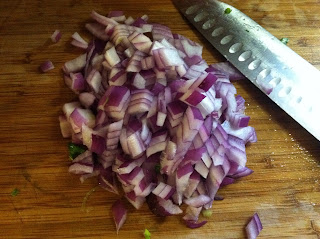
If you have kids, this can be a fun food to make together. I call it creating a mountain. First, add your ground beef.  We'll call this the base.  Then, finely chop the onion, green pepper,  and garlic.You do not need a garlic press.  Just smash the clove and chop or buy the jar of chopped garlic in the store.


It's extremely important, I learned this from my husband, to finely chop these to prevent the meatball from 'cracking open'.....we've all had that happen before!!  Now, sprinkle them over the mountain of meat!! The mountain has green trees and now 'snow' with the onions and garlic!!

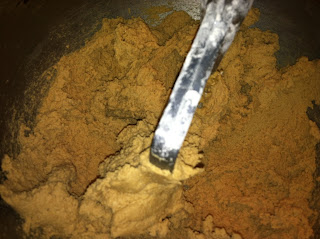
Add the V-8 juice and egg to the meatball mixture along with the grated parmesan cheese


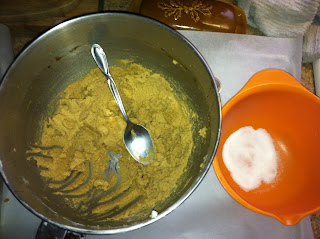
Mix on medium speed until everything is uniformly mixed and moist.  The V-8 juice will add moisture and make the meatballs super juicy, not to mention WONDERFUL flavor!!!! 


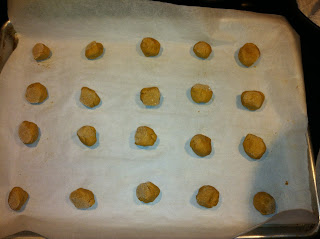
Finally, take a small scoop and roll into 2 inch balls.  Try your hardest to make them the same size. My husband can make his look as if they were machine rolled. I'm not that talented! Bake in a preheated 350 degree oven for 15-20 minutes.  This recipe yields 36 meatballs. Not only do they taste better, but they are far more healthier than their sodium-laced frozen counterparts.  Serve them with the same sauce used in my chicken parmesan recipe.  These are excellent to freeze due to the high yield this recipe makes.  They make excellent sandwiches as well.  It's one of those foods you can make on a Sunday and have for a few meals during the week.  Buy the meat on sale and you can make these for under $10.


I wanted to share one of my gadget annoyances with you. When buying measuring spoons, the best are the metal spoons with the engraved measurements.  Nothing is worse than trying to find the correct measure on the spoon if it is no longer there!! They do not have to be costly, just engraved. Look at the difference between the metal ones and the plastic KitchenAid set!!!  See what I mean???


                                            Sorry, KitchenAid, but you failed on this one!!!

Tuesday, November 12, 2013

Chicken Parmesan

My husband loves chicken parmesan.  Over the years, I've been mastering my skills to make one acceptable to him!! I have found the key to this dish is to make a homemade sauce and properly bread/cook the chicken.

First, start the sauce!!  Chop a medium vidalia onion, also called a sweet onion, into small pieces along with 4 tbsps. of minced garlic, salt & pepper into a sauce pan with olive oil. Add a pound of campari tomatoes or roma tomatoes cut into quarters.  Cook on medium heat for approx. 10 minutes.The skins will come off and float to the top. I leave mine in, but you can take them out.  Add 2 tbsps. of concentrated tomato paste and one large can of tomato puree.  Generously season with Italian seasoning and fresh basil, if you have it available. Turn the heat down to low/simmer. Cover and occasionally stir for 30 minutes. Because I love a little sugar, I add about 2 tbsps. as well!!


While the sauce is simmering, start breading the chicken.  There are many different ways to do this, however, the one I will show you seems to have the best result for me so far.  Turn a boneless chicken breast on its SIDE and carefully cut down the middle.  You will have a thin, trim cutlet to work with.  Take three bowls and fill one with flour, one with egg, one with seasoned Panko bread crumbs and 1/4 c. pamesan cheese.
Bread in this order, Flour, Egg, Bread crumbs......Remember FEBruary when in doubt!!


Pour approximately enough canola in a large skillet to measure about 1 1/2 inches on medium heat.  When the oil is HOT, place each chicken breast in and cook for 5 minutes on each side.

Finish the cooking process by placing them in the oven at 350 degrees for an additional 15-20 minutes.  This is done during the same time your sauce is cooking. Cook 1 lb. of  spaghetti noodles at this time.

Take the chicken out of the oven and place 1/4 c. sauce along with mozzarella cheese on top of each piece. Put back into the oven for 5 minutes.  Take out and serve with a generous portion of pasta.


There are many great sauces in the grocery store if you want to save the time of making homemade.  I think that since the sauce is simmering while you bread and cook the chicken it's pretty easy to do.

The process of breading and frying the chicken before baking allows it to be crispy on the outside and unbelievably juicy on the inside.  We've all had soggy chicken parmesan before and it's because this step was skipped.  It's worth the extra effort!! 

This meal is another affordable family dinner for about $8.00.  It serves 6 easily. 


Saturday, November 9, 2013

Stovetop Mac & Cheese


This recipe for macaroni and cheese can be done on the stove for under 20 minutes.  It's super rich and extremely easy to make at times when you may want something in a hurry!!

                                                     Ingredients:  1 lb. Macaroni Shells
                                                             1/2 stick of butter
                                                              1/3 c. flour
                                                            3 c. Whole Milk
                                                            3 tbsp. Dijon Mustard
                                                            3 c. Blended Cheese
                                                                   1/2 onion
                                                          Salt & Pepper to Taste
                                             (A little parsley for garnish is optional)

                                             
Start by getting the pasta water boiling. At the same time, melt the butter in a separate pot. Chop the onion into medium pieces and saute them in the melted butter.  Add salt and pepper at this time.

When the onions reach a translucent stage, it is time to make the roux!! Note: A roux is usually equal parts flour and butter .This can be challenging if you've never done it before.  Add 1/3 c. flour to the onion and butter.


Stir and continue cooking until it reaches a thick, golden brown consistency.  Don't be afraid to let it brown.
I am very generous with my pepper. I'm a little more cautious with the salt, but no one wants bland food.


A plug for one of my most used pieces of kitchen equipment is my large Pampered Chef multi-purpose
measuring bowl/cup.  Pyrex makes a nice one, too.  I have several sizes in the Pyrex line. I use them every time I cook.  They are all extremely affordable.  That said, warm 3 cups of milk in the microwave. You could
use 1 or 2 % but if you want it to be REALLY creamy, go for broke and use whole milk!
I can't stress warming the milk enough before adding it to your roux.  If the milk were cold, it truly compromises it's consistency.
Add the Dijon mustard and the shredded cheese, one cup at a time.  I like to mix the my cheese.  I always use a yellow cheddar, but I also add a cup of shredded super sharp and a cup of shredded swiss. You can buy a three or five cheese blend in the grocery store, too. One of my favorite things is shredding the cheese so I always do it myself.

Stir slowly until it is well blended and melted.  It will thicken over time.  Don't make the mistake of thinking you need more cheese!! You will end up with cement if you do.  The shells should be ready to add at this time.  Strain them, but do not rinse them!!!  The cheese will adhere to the pasta 100% better and it will help thicken the cheese sauce. 


                               Finish the dish with a little chopped parsley and campari tomatoes


A couple of tidbits to leave you with...............I find shells are the ideal pasta to use for this dish because of their ability to collect the cheese sauce! They also hold up well for reheating.  The Dijon Mustard also adds great flavor to the sauce.  You can use yellow mustard, but I find it's not as tasty.  This meal is so affordable, too.  It serves approximately 8 for around $6.00!!

I wish I had made this for my children when they were little. I always thought it was too much work and too much money. Little did I realize that for the same amount of time and a little more money, I could have fed them so much better!! Live and learn, they still love me!! 

Chocolate Chip Cookie Bars

                                                                    With all good intentions, I truly wanted to make a double batch of choco...